
When the clock struck 5 PM, I found myself in my kitchen after a long day, craving something nourishing yet exciting. After a brief rummage through the fridge, inspiration struck like a bolt of lightning: my trusty tub of Greek yogurt was calling! I decided to elevate it into a delightful dish that dances between a comforting dessert and a healthy snack—Baked Greek Yogurt.
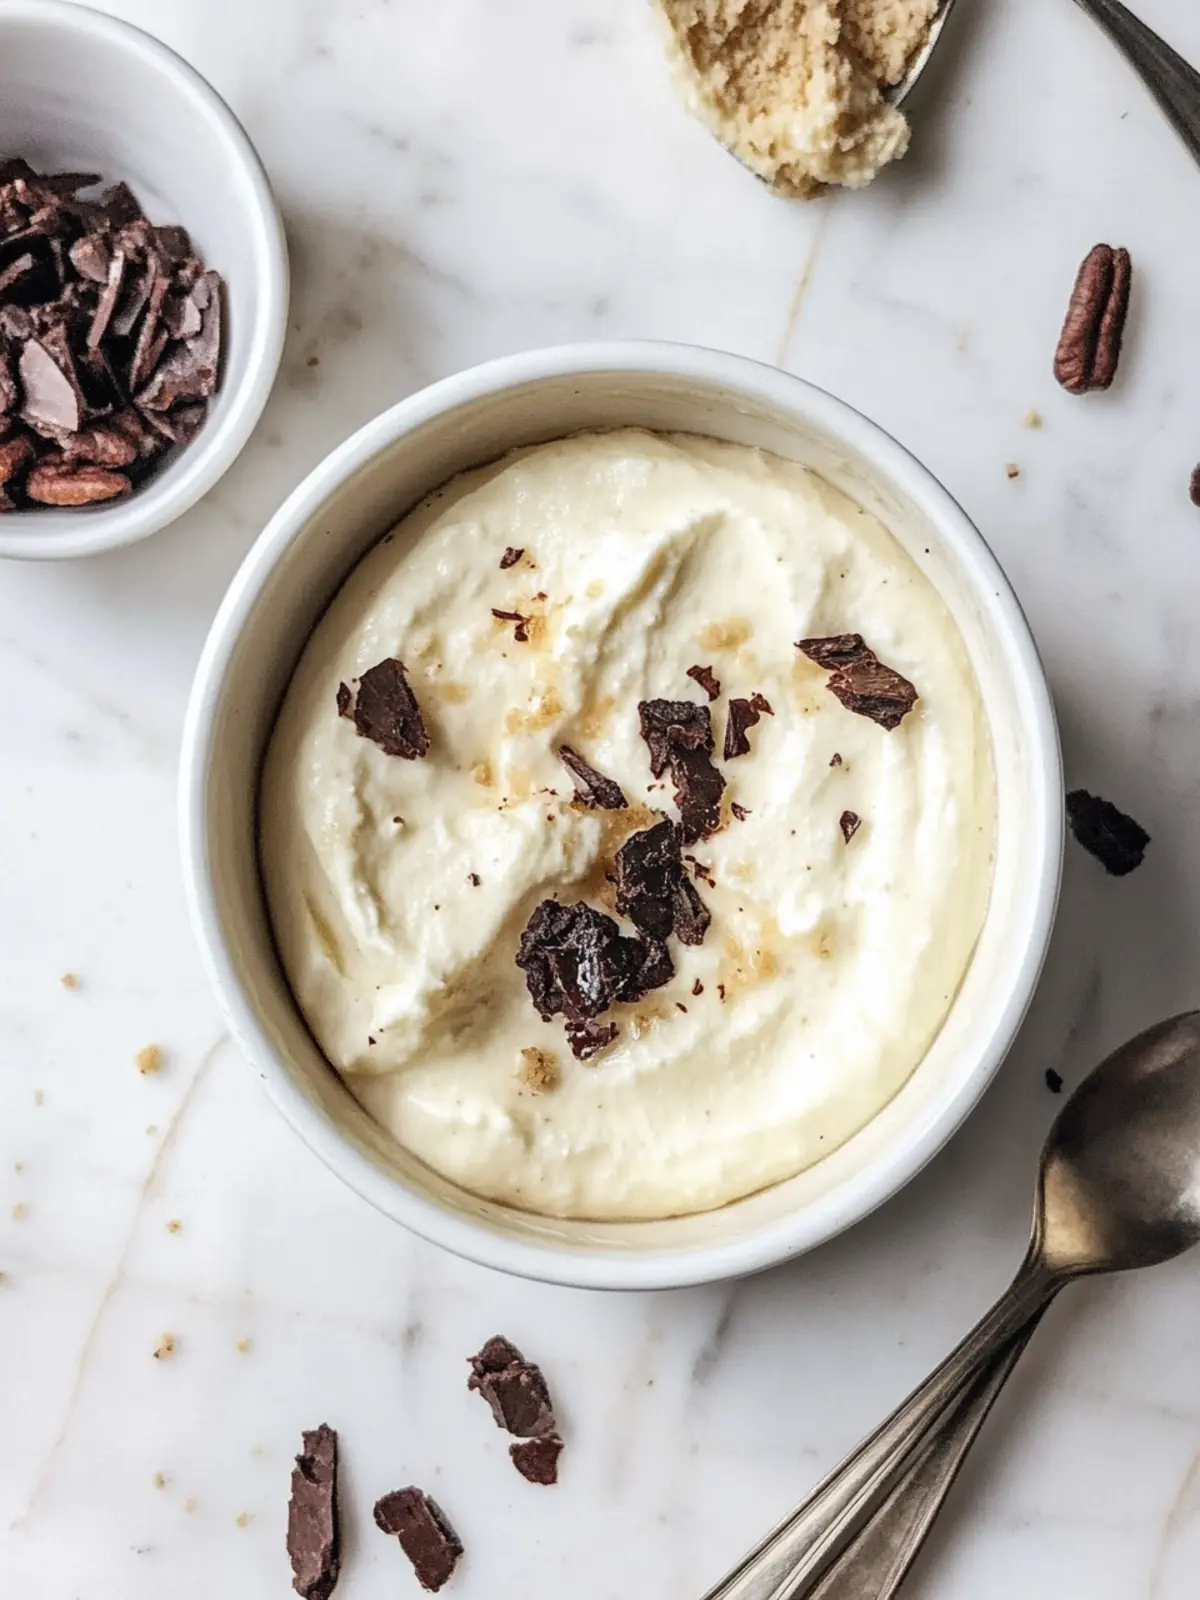
This recipe is as simple as it is satisfying. With a handful of ingredients, you can whip up a creamy, protein-packed treat that feels indulgent without the guilt. Imagine the warm aroma wafting through your kitchen as it bakes to perfection, offering a jiggly center and a golden crust, ready to be topped with your favorite berries or chocolate chips. Whether you’re from a busy household or just want a cozy evening alone, this dish promises versatility and flavor in every bite. Let’s dive into this deliciousness together!

Why is Baked Greek Yogurt so irresistible?
Deliciously creamy, this dessert offers the perfect blend of indulgence and nutrition.
Protein-packed, with 46.5g per serving, it’s a guilt-free treat.
Quick prep time of just 5 minutes means you can whip this up any day.
Versatile enough to customize with berries or chocolate chips for personal flair!
Satisfying and comforting, its warm, jiggly center feels like a hug in a bowl.
Try it out for a delightful dessert that everyone will adore!
Baked Greek Yogurt Ingredients
• Here’s everything you need to create a tasty Baked Greek Yogurt!
For the Base
- Nonfat Plain Greek Yogurt – A creamy base that’s high in protein and low in sugar, perfect for a guilt-free treat.
- Egg – Adds richness and helps bind the ingredients together, giving a delightful texture.
- Unsweetened Almond Milk – Use this to adjust the consistency if the mixture becomes too thick; it keeps it dairy-friendly.
- Vanilla Protein Powder – Boosts protein content while adding a hint of sweetness and delicious flavor.
- Cornstarch – Helps to create a smooth, creamy texture that holds together beautifully during baking.
Optional Additions
- Chopped Berries – Freshly chopped berries add natural sweetness and a burst of vibrant flavor to your Baked Greek Yogurt.
- Chocolate Chips – Indulge your sweet tooth with these little gems for an extra treat in your healthy dessert!
Dive into your kitchen and let the magic happen with this easy-to-fall-in-love Baked Greek Yogurt recipe!
How to Make Baked Greek Yogurt
-
Preheat the oven to 350°F, and grease a large ramekin or two small ramekins with non-stick cooking spray. This prevents sticking and ensures easy serving.
-
Whisk together the Greek yogurt and egg in a large bowl until fully combined. This mixture serves as the creamy base for your delightful baked creation.
-
Incorporate the vanilla protein powder and cornstarch into the mixture and stir gently until smooth. Avoid over-mixing; a few lumps are okay!
-
Adjust the consistency by adding almond milk if the batter is too thick and not pourable. The goal is a pourable yet thick batter that spreads well.
-
Taste the mixture and add your preferred sweetener if desired. This step allows you to customize the sweetness to your liking!
-
Fold in the optional chopped berries if you’re using them, adding a fresh pop of flavor that pairs beautifully with the yogurt base.
-
Pour the batter into your prepared ramekin(s), smoothing the top to ensure even baking. Aim for a nice level surface.
-
Bake in the preheated oven for 30 minutes (20 minutes for small ramekins). The center should be jiggly or soft to the touch when done.
-
Cool for about 30 minutes at room temperature, then chill in the fridge for around 1 hour for the ultimate flavor and texture.
Optional: Top with a sprinkle of fresh berries or chocolate chips before serving for an extra touch of indulgence!
Exact quantities are listed in the recipe card below.
Expert Tips for Baked Greek Yogurt
-
Ingredient Room Temp: Use room temperature eggs and yogurt for a smoother mixture that incorporates easily, avoiding any lumps.
-
Watch the Bake: Keep an eye on the baking time to prevent overcooking; a slight jiggle in the center indicates it’s just right, ensuring a creamy texture.
-
Avoid Over-mixing: Gently combine ingredients to maintain the airy texture. Over-mixing can lead to a denser final product, which isn’t the goal.
-
Chill Before Serving: Allowing the Baked Greek Yogurt to chill in the fridge for at least an hour enhances the flavors and creates a pleasing, firm consistency.
-
Sweeten to Taste: Taste your batter before baking to adjust sweetness. Remember, the flavor develops during baking, so balance it carefully!
-
Customization is Key: Don’t hesitate to experiment with your favorite mix-ins. Different fruits or a hint of vanilla can tailor this Baked Greek Yogurt to your cravings!
What to Serve with Baked Greek Yogurt?
Imagine a spread of vibrant dishes on your table that pairs harmoniously with this creamy delight, creating a nourishing and satisfying meal experience.
-
Fresh Fruit Salad: A colorful mix of seasonal fruits adds brightness and complements the yogurt’s creaminess with its juicy textures.
-
Crunchy Granola: A sprinkle of granola provides a delightful crunch, enhancing the overall experience while adding a wholesome touch of fiber.
-
Honey Drizzle: A light drizzle of honey can elevate the sweetness of the Baked Greek Yogurt, adding a luscious layer of flavor to each bite.
-
Nut Butter Swirl: Creamy almond or peanut butter swirled into the dish creates a satisfying richness and nutty flavor to invigorate your dessert.
-
Herbed Toasts: Serve alongside herbed toasts topped with avocado for a savory contrast that balances the sweet flavors beautifully.
-
Chilled Herbal Tea: Pairing with a refreshing mint or chamomile tea ties the meal together, offering soothing flavors to cleanse the palate.
-
Greek Salad: A side of Greek salad, with its tangy dressing and fresh veggies, creates a delightful contrast to the creamy yogurt.
-
Dark Chocolate Shavings: Finish off with a sprinkle of dark chocolate shavings for an elegant touch that introduces a rich, decadent surprise.
Explore these pairings to elevate your Baked Greek Yogurt experience and create a cozy, memorable meal!
Baked Greek Yogurt Variations
Get creative with your own delicious twist on this recipe!
- Dairy-Free: Substitute Greek yogurt with coconut yogurt for a rich, creamy alternative that keeps the dish vegan-friendly.
- Fruit-Infused: Mix in mashed banana or applesauce for natural sweetness and flavor without adding extra sugar. It’s a delightful surprise!
- Nutty Bliss: Add a tablespoon of almond or peanut butter to the batter for a nutty flavor and extra protein boost; it’s pure indulgence!
- Chocolate Lover: Swap out vanilla protein powder for chocolate protein powder to transform this dessert into a dreamy chocolate treat.
- Sweet & Spicy: Sprinkle in some cinnamon or nutmeg for a warm, fragrant twist that adds cozy, spiced notes to your yogurt.
- Savory Sensation: For a unique take, incorporate herbs like thyme or basil to enjoy a savory baked yogurt option perfect for brunch.
- Sugar-Free: Use a zero-calorie sweetener like stevia or erythritol to satisfy your sweet tooth while keeping it low-calorie.
- Layered Delight: Create a parfait by layering the baked yogurt with your favorite granola and fruit for a satisfying breakfast or dessert!
Make Ahead Options
Baked Greek Yogurt is an excellent choice for meal prep, saving you time on busy weeknights! You can prepare the yogurt mixture up to 24 hours in advance; simply whisk together the Greek yogurt, egg, protein powder, cornstarch, and almond milk, then store it in the refrigerator in an airtight container. To maintain quality, avoid adding any chopped berries or chocolate chips until you’re ready to bake. When it’s time to bake, just pour the mixture into your greased ramekins, fold in your chosen toppings, and pop it in the oven for 30 minutes. This way, you’ll have a nutritious and delicious dessert ready to enjoy with minimal effort!
How to Store and Freeze Baked Greek Yogurt
Room Temperature: It’s best to enjoy Baked Greek Yogurt after cooling for 30 minutes at room temperature. Avoid leaving it out for more than 2 hours.
Fridge: Store any leftovers in an airtight container in the fridge for up to 3 days. This ensures that your Baked Greek Yogurt stays fresh and delicious.
Freezer: You can freeze portions in airtight containers for up to 2 months. To reheat, let it thaw in the fridge overnight and warm gently in the oven or microwave until heated through.
Reheating: When you’re ready to enjoy your Baked Greek Yogurt again, reheat in the oven at 350°F for about 10-15 minutes, or microwave in 30-second intervals until warmed.

Baked Greek Yogurt Recipe FAQs
How do I select the best Greek yogurt for this recipe?
Absolutely! When choosing Greek yogurt, look for a brand that is labeled “nonfat” or “low-fat” to maintain the healthy profile of your Baked Greek Yogurt. Ideally, it should have no added sugars and consist of simple ingredients: just milk and live cultures will do the trick. Check the expiration date as well to ensure freshness!
What is the best way to store leftovers of Baked Greek Yogurt?
Very! Leftover Baked Greek Yogurt can be stored in an airtight container in the fridge for up to 3 days. It’s best to allow it to cool completely at room temperature for about 30 minutes before transferring it to the fridge to keep the texture just right. You can enjoy it cold, straight from the container, or reheat it if you prefer!
Can I freeze Baked Greek Yogurt? How do I do that?
Of course! To freeze your Baked Greek Yogurt, let it cool completely, then portion it into airtight containers. You can freeze it for up to 2 months. When you’re ready to enjoy it again, thaw it in the fridge overnight. To reheat, place it in an oven preheated to 350°F for about 10-15 minutes, or microwave it in 30-second intervals until warmed throughout.
What should I do if my Baked Greek Yogurt comes out too dense or dry?
It’s all about the blending! If your Baked Greek Yogurt turns out dense or dry, it might be due to over-mixing or over-baking. To avoid this, make sure you blend the ingredients just until combined without excessive stirring. Ensure your baking time is precise; look for that soft, jiggly center. If it’s not quite right, consider adding a splash more almond milk next time.
Is Baked Greek Yogurt safe for pets or those with allergies?
Absolutely! However, if you’re thinking of sharing with pets, it’s best to avoid giving them any as dairy can cause upset stomachs for some animals. For those with allergies, ensure your protein powder and yogurt have no added allergens, and consider swapping almond milk for oat or coconut milk for nut-free alternatives. Always read labels carefully!

Deliciously Creamy Baked Greek Yogurt for a Healthier Dessert
Ingredients
Equipment
Method
- Preheat the oven to 350°F, and grease a large ramekin or two small ramekins with non-stick cooking spray.
- Whisk together the Greek yogurt and egg in a large bowl until fully combined.
- Incorporate the vanilla protein powder and cornstarch into the mixture and stir gently until smooth.
- Adjust the consistency by adding almond milk if the batter is too thick.
- Taste the mixture and add your preferred sweetener if desired.
- Fold in the optional chopped berries if you're using them.
- Pour the batter into your prepared ramekin(s), smoothing the top.
- Bake in the preheated oven for 30 minutes (20 minutes for small ramekins). The center should be jiggly.
- Cool for about 30 minutes at room temperature, then chill in the fridge for around 1 hour.