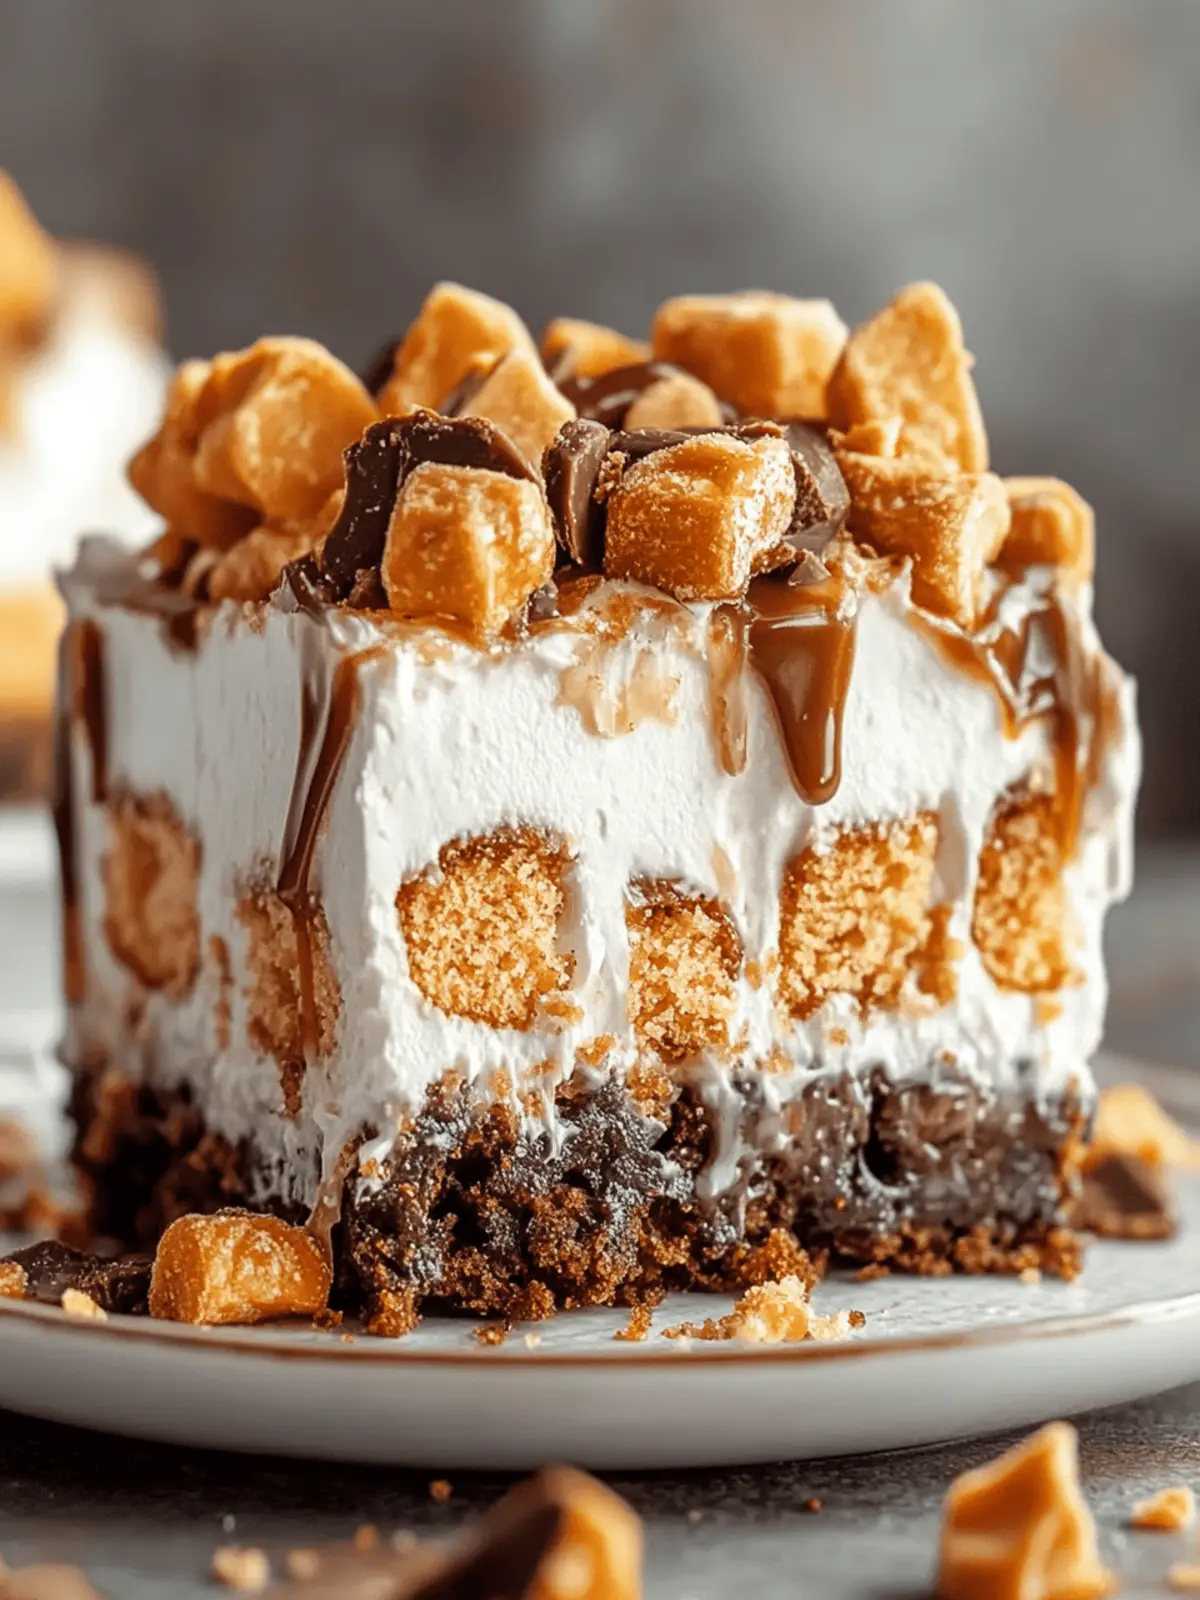
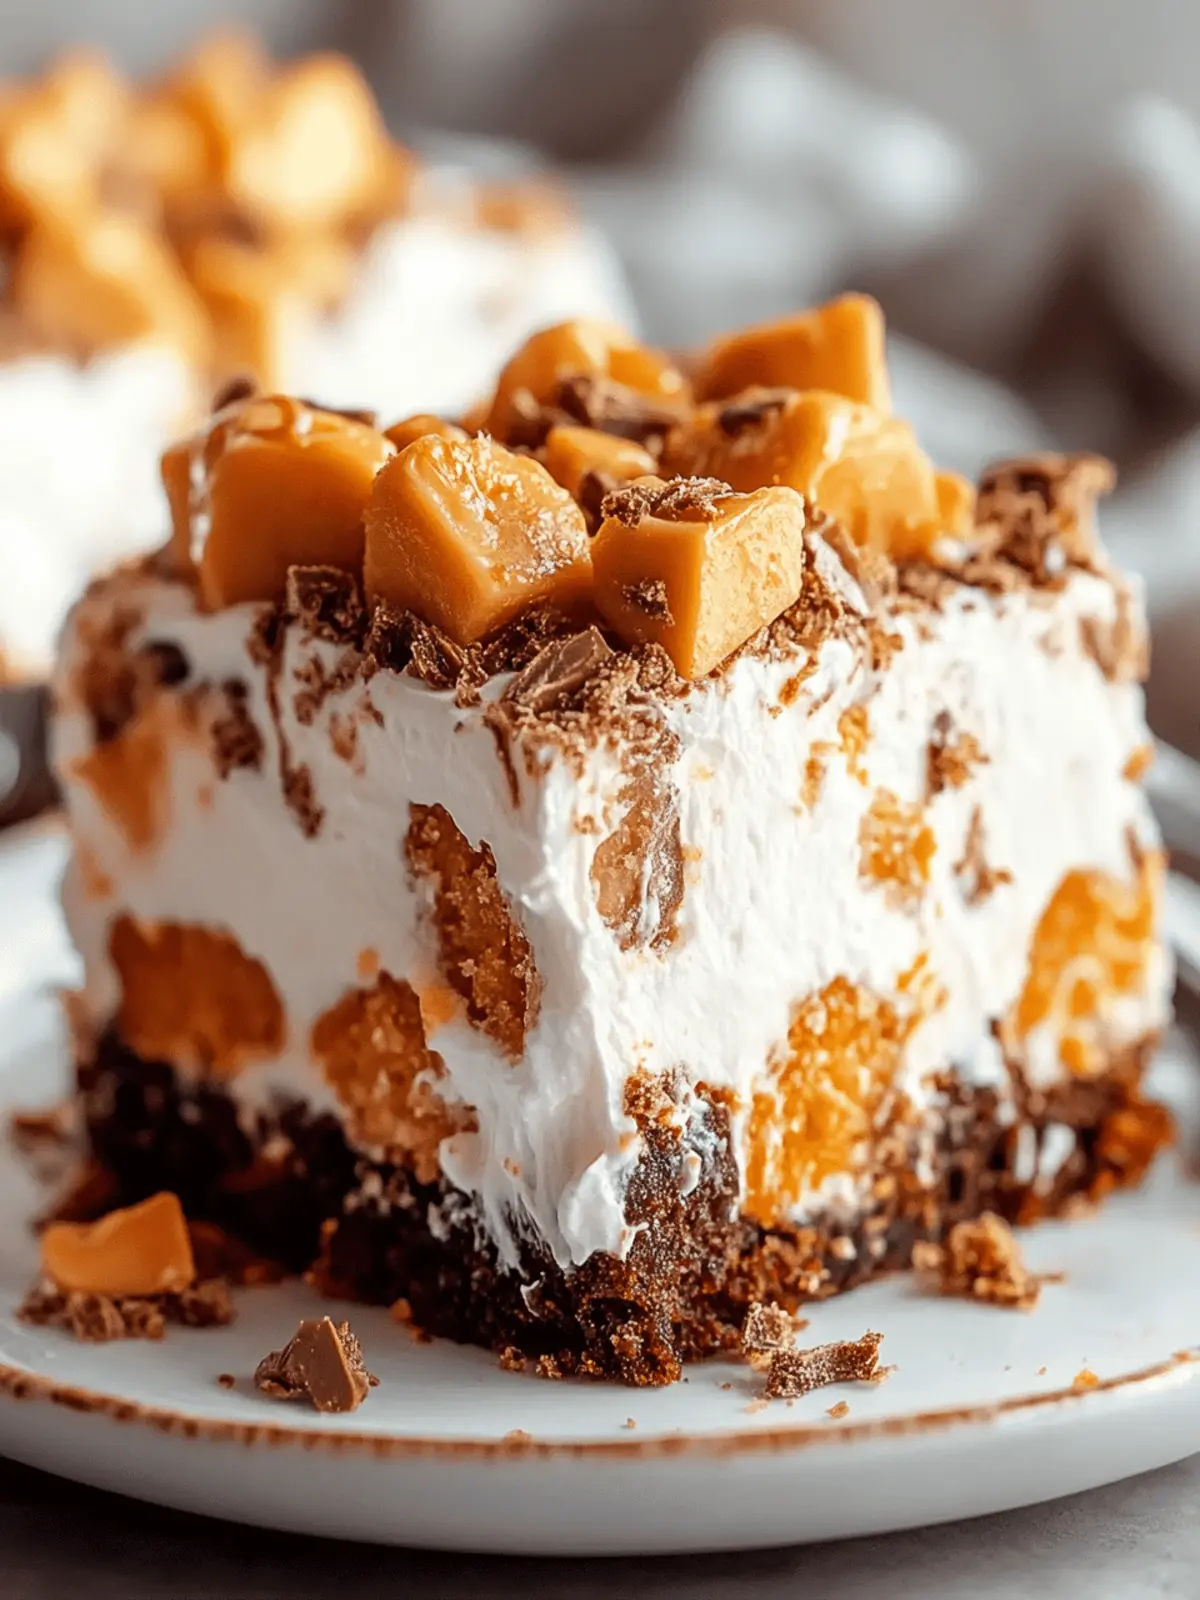
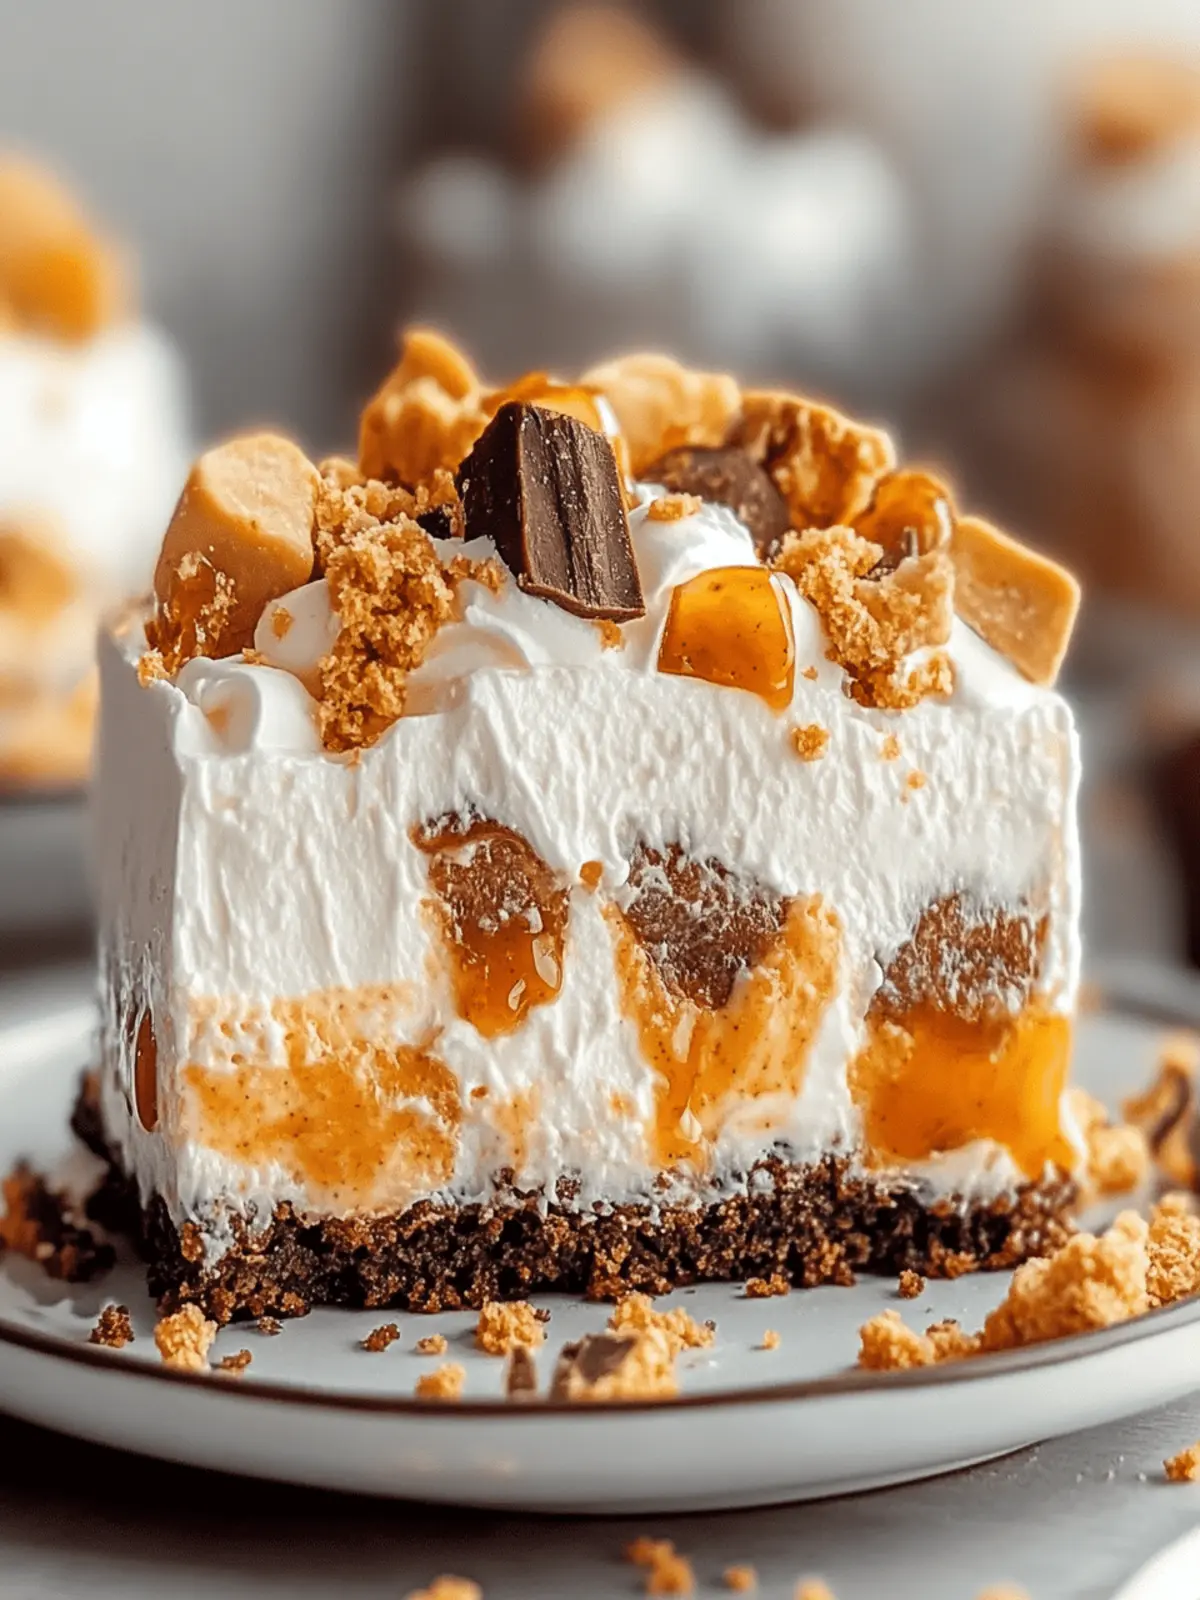
There’s just something about the combination of ooey-gooey caramel and crunchy Butterfinger bars that brings a smile to my face. Recently, while hosting a cozy gathering, I sought a dessert that would not only please a crowd but also impress without hours spent in the kitchen. That’s when I stumbled upon the delightful Butterfinger Poke Cake—a recipe that beautifully marries the simplicity of a boxed cake mix with rich, luxurious toppings.
This decadent dessert is both easy to make and incredibly versatile, making it a go-to option for any occasion, whether it’s a potluck or a simple family dinner. It’s the kind of cake that invites creativity—feel free to swap in your favorite cake flavors or top it with crushed candies of your choice!
Join me as we dive into this sweet adventure, where every bite reveals a velvety cake saturated with luscious caramel and adorned with crunchy Butterfinger bits, all topped off with a light, fluffy whipped cream. Get ready to indulge!
Why is Butterfinger Poke Cake a must-try?
Indulgence at its finest: The combination of caramel and Butterfinger gives a rich, delightful flavor that’s truly irresistible.
Easy to prepare: With a simple boxed cake mix, you’ll spend less time in the kitchen and more time enjoying it.
Versatile options: Feel free to customize with your favorite cake flavors or toppings, whether it’s crushed Oreos or different candies.
Perfect for gatherings: This is a crowd-pleaser that’s sure to impress, making it ideal for potlucks or family dinners.
Gooey texture: Each slice reveals a moist cake infused with gooey caramel and topped with a fluffy whipped cream for a heavenly finish.
Don’t miss out on the fun—try creating your own variations for an even more personalized treat!
Butterfinger Poke Cake Ingredients
For the Cake
• Yellow Cake Mix – A convenient base that creates a soft, buttery structure.
• Eggs – Essential for binding the ingredients and providing moisture, use as directed on the box.
• Oil – Helps keep the cake moist; vegetable oil is a great option.
• Water – Needed for the cake mix; enhances the cake’s texture.
For the Filling
• Sweetened Condensed Milk – Adds sweetness and moisture; substitute with evaporated milk for a lighter option.
• Salted Caramel Sauce – Provides rich flavor; both store-bought and homemade versions work beautifully.
For the Topping
• Heavy Whipping Cream – Creates a light and creamy whipped topping; Cool Whip can be used as a substitute.
• Granulated Sugar – Sweetens the whipped cream; you can adjust the amount based on your sweetness preference.
• Vanilla Extract – Enhances the overall flavor of the topping; it’s recommended for the best taste.
• Butterfinger Candy Bars – Offers a delightful crunch as a topping; feel free to get creative with other candies like Snickers or Reese’s Pieces.
Every ingredient in this Butterfinger Poke Cake adds a unique layer of flavor and texture, culminating in a dessert that’s not just easy to bake but also a sure hit at any gathering!
How to Make Butterfinger Poke Cake
-
Preheat and Prepare: Start by preheating your oven according to the cake mix instructions. Grease a 9×13-inch pan to ensure your cake comes out easily.
-
Make the Cake Batter: Prepare the yellow cake mix by following the package directions. Pour the batter evenly into the greased pan and bake as instructed until golden brown.
-
Combine the Filling: While the cake is baking, mix together sweetened condensed milk and salted caramel sauce until smooth and uniform. This will create a delightful filling.
-
Poke Holes: Once the cake is out of the oven and still warm, use the handle of a wooden spoon to poke holes all over the top—this will allow the filling to seep in beautifully.
-
Infuse with Caramel: Carefully drizzle the caramel mixture over the warm cake, making sure it fills the holes for maximum flavor infusion.
-
Cool and Chill: Let the cake cool completely. Once cool, sprinkle half of the chopped Butterfinger candies over the top, cover, and refrigerate for at least 2 hours.
-
Whip the Topping: In a mixing bowl, whip the heavy cream, granulated sugar, and vanilla extract together until medium peaks form. This will create a light and fluffy topping.
-
Assemble the Cake: Spread the whipped cream evenly over the chilled cake and finish by topping with the remaining Butterfinger pieces. Slice and serve to enjoy!
Optional: Serve with a scoop of vanilla ice cream for an extra layer of indulgence.
Exact quantities are listed in the recipe card below.
What to Serve with Butterfinger Poke Cake?
Indulge in a full-flavored experience that beautifully complements the sweet, gooey goodness of this delightful dessert.
- Vanilla Ice Cream: A classic pairing that adds temperature contrast and creamy richness, balancing the cake’s sweetness perfectly.
- Fresh Berries: Their tartness cuts through the decadence of the cake, providing a refreshing counterpoint. Strawberries, raspberries, or blueberries are delightful choices!
- Chocolate Drizzle: Elevate the presentation with a rich chocolate drizzle—it adds flavor and an appealing visual touch to each slice.
- Caramel Sauce: For an extra decadent treat, drizzle additional caramel sauce over each piece. This enhances the existing flavors for a true indulgence.
Imagine serving this cake at a summer gathering, set against a backdrop of laughter and conversations, where each bite is met with smiles and contentment.
- Coffee or Espresso: The rich, bold flavors of a cup of coffee or espresso complement the sweetness of the cake, making it an ideal after-dinner treat.
- Whipped Cream: While the cake already has a topping of whipped cream, offering extra on the side allows guests to customize their experience.
- Chocolate Milkshake: For a playful pairing, serve a chocolate milkshake that mirrors the cake’s flavors—kids and adults alike will adore it!
- Lemonade: A refreshing, tangy lemonade serves as a wonderful palate cleanser, enhancing the dessert without overwhelming it.
With these perfect pairings, your Butterfinger Poke Cake will surely become the highlight of any occasion!
How to Store and Freeze Butterfinger Poke Cake
Fridge: Cover the cake tightly with plastic wrap and refrigerate for up to 3 days. Chilling allows the flavors to meld beautifully.
Freezer: For longer storage, cut the cake into slices, wrap each piece in foil, and place in an airtight container. It can be frozen for up to 2 months.
Reheating: Thaw the frozen slices in the refrigerator overnight before enjoying. Serve chilled or at room temperature for a delightful treat.
Note: Ensure the Butterfinger topping is added fresh before serving to maintain its crunchiness.
Expert Tips for Butterfinger Poke Cake
-
Chill for Flavor: Allow the cake to chill in the refrigerator for at least 2 hours. This will let the flavors meld and enhance the overall taste and texture.
-
Gentle Drizzle: When pouring the caramel mixture over the cake, use a gentle hand. This will prevent flooding and ensure the filling seeps into the poked holes evenly.
-
Perfect Whipped Cream: Whip the heavy cream until medium peaks form; overwhipping can lead to a grainy texture. This light topping is essential for the Butterfinger Poke Cake’s delicious finish.
-
Custom Fillings: Feel free to swap out the caramel sauce for other flavored syrups, like chocolate fudge. This adds a unique twist to your Butterfinger Poke Cake.
-
Experiment with Layers: Use different cake mixes or toppings, such as crushed Oreos or various candy bars, to suit your tastes and creative flair!
Make Ahead Options
These Butterfinger Poke Cakes are a lifesaver for busy home cooks! You can prepare the cake itself up to 24 hours in advance. Simply bake the cake and allow it to cool completely before poking holes and drizzling the caramel mixture over it. Afterward, sprinkle half of the chopped Butterfinger pieces on top, cover it tightly, and refrigerate. This not only saves time on the day of serving but allows the flavors to meld beautifully. When you’re ready to serve, whip up the topping and spread it over the chilled cake, finishing with the remaining Butterfinger pieces. It will be just as delicious and flavorful, making mealtime a breeze!
Butterfinger Poke Cake Variations
Feel free to get creative with this dessert and customize it to match your taste buds and mood!
-
Chocolate Cake: Swap the yellow cake mix for chocolate cake mix for a rich twist that’ll satisfy any chocolate lover.
-
Fruity Fun: Add chopped strawberries or bananas into the whipped cream for an unexpected fruity kick, balancing sweetness with freshness.
-
Nutty Crunch: Incorporate chopped nuts, such as pecans or walnuts, into the filling or sprinkle on top for added texture and flavor.
-
Spicy Delight: Use a spice cake mix instead of yellow for warm, comforting notes that pair wonderfully with caramel.
-
Pumpkin Spice: For a seasonal twist, try using a pumpkin cake mix for an autumn-inspired Butterfinger Poke Cake!
-
Caramel Swirl: Drizzle extra caramel sauce between layers of cake and whipped cream for a more indulgent, gooey experience.
-
Minty Fresh: Add a few drops of peppermint extract to the whipped cream for a refreshing mint touch that pairs beautifully with chocolate.
-
Syrup Swaps: Experiment with flavored syrups like caramel macchiato or hazelnut instead of regular caramel for unique taste explosions!
Butterfinger Poke Cake Recipe FAQs
What type of cake mix is best for Butterfinger Poke Cake?
I recommend using a yellow cake mix for its buttery flavor, but feel free to experiment with chocolate or spice cake mixes for a unique twist! Each flavor will blend beautifully with the caramel and Butterfinger toppings.
How long can I store Butterfinger Poke Cake in the fridge?
You can store Butterfinger Poke Cake in the refrigerator for up to 3 days. Be sure to cover it tightly with plastic wrap; this helps the flavors meld and keeps the cake moist while it’s stored.
Can I freeze Butterfinger Poke Cake? If so, how?
Absolutely! To freeze, cut the cake into slices and wrap each piece individually in foil. Then place the wrapped slices in an airtight container. This way, the Butterfinger Poke Cake can be enjoyed for up to 2 months. Thaw in the refrigerator overnight before enjoying, and remember to add the Butterfinger topping fresh to keep its crunch!
How do I prevent the cake from getting soggy when adding the caramel filling?
To avoid sogginess, make sure to drizzle the caramel gently and give it time to seep into the holes without overwhelming the cake. Using a spoon handle to poke holes at even intervals throughout the cake will help with even distribution, allowing the cake to absorb just the right amount of flavor without becoming overly saturated.
Are there any allergens I should be aware of when making this cake?
Yes, be mindful of common allergens such as gluten in the cake mix, dairy in the heavy cream and sweetened condensed milk, and potential nuts in the Butterfinger candies. If you’re catering to allergies, consider using a gluten-free cake mix and ensuring all toppings and fillings are allergy-friendly.
Can I make Butterfinger Poke Cake ahead of time?
Certainly! You can prepare the cake a day in advance. Bake and poke the holes, then add the caramel filling and let it chill overnight. Just whip the cream and add the toppings when you’re ready to serve for the best texture and flavor!
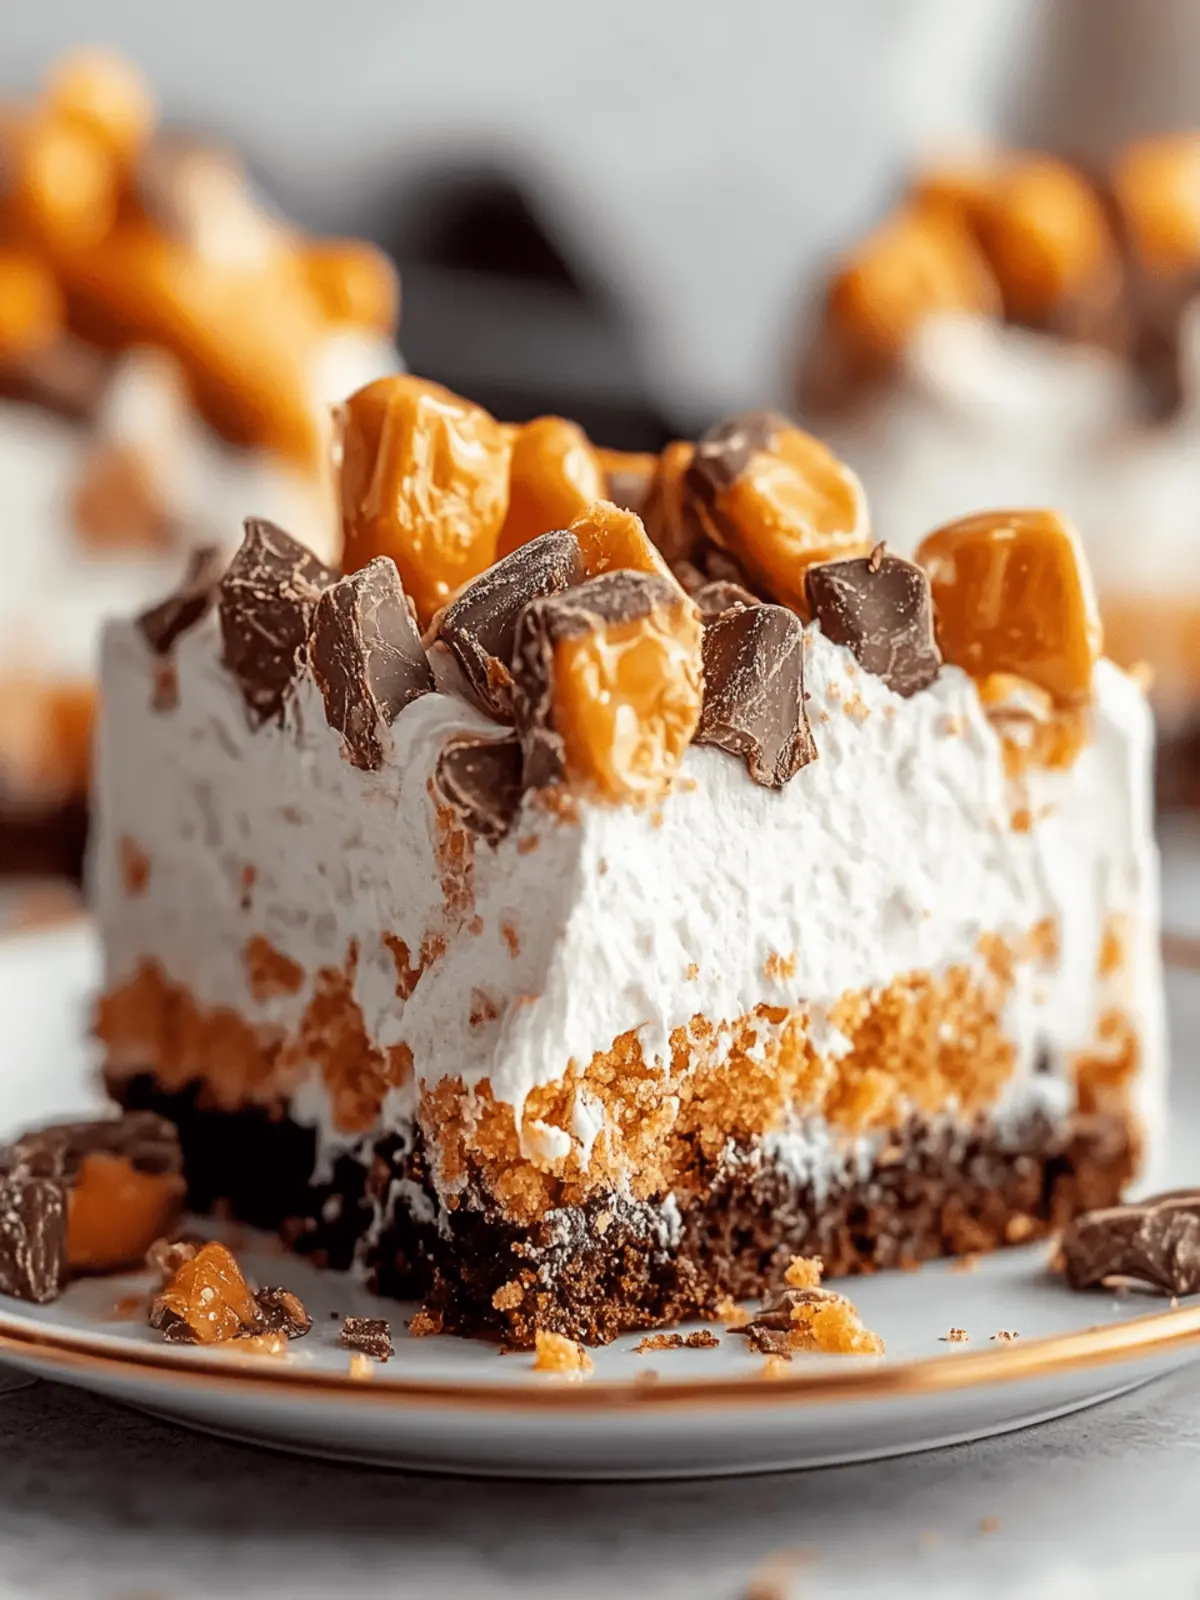
Delicious Butterfinger Poke Cake: A Sweet Crowd-Pleaser!
Ingredients
Equipment
Method
- Preheat your oven according to the cake mix instructions. Grease a 9x13-inch pan.
- Prepare the yellow cake mix by following the package directions. Pour the batter into the greased pan and bake until golden brown.
- Mix together sweetened condensed milk and salted caramel sauce until smooth.
- Poke holes all over the warm cake with a wooden spoon handle.
- Carefully drizzle the caramel mixture over the warm cake, filling the holes.
- Let the cake cool completely, then sprinkle half of the chopped Butterfinger candies over the top, cover, and refrigerate for at least 2 hours.
- Whip the heavy cream, granulated sugar, and vanilla extract together until medium peaks form.
- Spread the whipped cream evenly over the chilled cake and top with remaining Butterfinger pieces.
- Slice and serve to enjoy!

